
The short answer
Winterising an Ontario RV comes down to eight jobs. Get every drop of water out of the plumbing, including the water heater. Put non toxic RV antifreeze into the traps and drains that air cannot reach. Empty and rinse the holding tanks. Shut the propane off at the cylinder. Deal with the battery according to its chemistry, because lead acid and lithium want opposite things. Set the tires to placard pressure and get the weight distributed sensibly. Seal the holes rodents use and take the food out. Then park it somewhere level, blocked and supported, and check on it once in the middle of winter.
That is the whole guide in a paragraph. Everything below is the detail: which step people skip, which step people do wrong, what the actual published guidance says where published guidance exists, and where we could not find any and say so rather than making something up.
We are Kawartha RV Transport & Services, based in Beaverton. We tow, block, level and store RVs, trailers and park models across central and eastern Ontario, and we have moved more than 1,800 trailers in the last five years. Most of that work is seasonal, which means every October we watch several hundred units get put away and every April we watch them come back out. This page is what that pattern has taught us, cross checked against sources you can open yourself.
The one page version, if you are standing at the trailer right now
- Water heater first. Drain it, and set the bypass before you pump any antifreeze. This is the step most often missed and the most expensive one to miss.
- Low point drains. Open both, hot and cold, and leave them open until nothing more comes out.
- Every faucet open. Inside, outside, shower, both handles, and the toilet valve held down.
- Air, then antifreeze. Blow the lines if you have a compressor and a blow out plug, then pour antifreeze into every drain and trap so the P traps are protected.
- Tanks empty. Black first, then grey, then rinse. A full black tank in January is a solid block.
- Propane off at the cylinder. Not at the appliance. At the tank.
- Battery handled. Charged and disconnected, or removed, depending on what it is and where it sits.
- Tires to pressure. Cold pressure, on the placard, and expect it to drop as the weather does.
- Food out, holes shut. Every crumb, and every gap a pencil fits through.
- Level, blocked, supported. On ground that will still be there in March.
What this page will not do
It will not tell you the exact date to winterise, because nobody can. It will not print a temperature figure from a weather station we could not reach. And it will not repeat three widely copied claims that we checked against their supposed sources this week and found to be wrong. Those three are named in the sources section, with what the sources actually say.
When to do it in Ontario
The honest answer is: before the first hard overnight freeze, and that date moves every year. In our service area the safe window has generally closed by the end of October, and we have been called out to units that took damage in the last week of September. There is no calendar date that is right, only a forecast that is worth watching from about the middle of September onward.
What we would have liked to print here, and could not
We wanted to give you the climate normals for the closest weather station to our yard so you could see the actual distribution of first freeze dates rather than take our word for it. Environment and Climate Change Canada publishes Canadian Climate Normals for the 1991 to 2020 period, and the station search on their site returns the full unfiltered list of 448 Ontario locations no matter what station name is typed into the filter. We could not reach a station page for our area, so we are not printing station level normals on this page. We would rather leave a hole than fill it with a number we did not read off the source.
The same applies to the Ontario Building Code climatic design data, which contains a January design temperature for Ontario municipalities including our own. The provincial PDF returned an access error to us this week. It is not quoted here.
The rule we actually use
One night below freezing does not, by itself, destroy a water system. What destroys a water system is a night cold enough for long enough that the water sitting in a fitting, a valve body or a low spot goes solid. That is usually a low of a few degrees below zero held for several hours, not a brief dip at four in the morning. But the difference between "probably fine" and "split a fitting" is invisible from outside the trailer, and the repair is not.
So the rule is: when the fourteen day forecast first shows an overnight low below zero, that is your weekend. Not the weekend after.
Why freezing does the damage it does
Almost every winterising article you will read says that water expands about nine percent when it freezes. We went to check that against the United States Geological Survey, which is the source usually credited, and the sentence the USGS actually publishes is about density, not expansion. Their page states: "Upon freezing, the density of ice decreases by about 9 percent." They also publish "Ice is less dense than liquid water which is why your ice cubes float in your glass." and "The density of ice is about 90 percent that of water, but that can vary because ice can contain air, too."
A drop in density and an increase in volume are two sides of the same physical fact, so the popular version is not exactly wrong in spirit. But it is not what the source says, and we are not going to put quotation marks around a sentence the USGS never wrote. If you want the number, take the one they publish: ice is around ninety percent as dense as the water it came from, and that difference has to go somewhere. In a copper elbow or a plastic fitting, it goes into the walls of the fitting.
The two week rhythm that works
| When | What gets done |
|---|---|
| Mid September | Book the tow and the storage spot. Yards fill from the first week of October and the good ones fill first. |
| Late September | Last camping trip. Come home with the tanks already dumped and rinsed at the park, not full. |
| First half of October | Plumbing, propane, battery, tires, interior. This is the actual winterising weekend. |
| Mid to late October | Tow to storage, block, level, cover if you are covering it. |
| January or February | The mid winter walk around. Twenty minutes. |
| April | De winterise, sanitise the fresh water system, pressure test before the first trip. |
If you are having us move it, book earlier than you think you need to. Our October and November are the busiest weeks of our year and we work Monday to Saturday, 7:00am to 7:00pm. Sunday closed, by appointment only. through them. Details on how we quote a tow are on the RV transport cost guide, and what actually happens on moving day is on the preparing your RV for transport guide.
Draining the water system
This is the section that matters most, because it is the one where a mistake costs four figures and does not show itself until April. An RV water system is not one thing. It is a fresh tank, a pump, a hot side, a cold side, a water heater, an outside shower, an inside shower, a toilet valve, one or two low point drains, a city water inlet with a check valve, and on newer units a washing machine hookup and an outside kitchen. Every one of those holds water. Every one of those has to be empty.
Do it in this order
- Turn the water heater off and let it cool. Hours, not minutes. Draining a hot water heater is a good way to get scalded and a good way to crack a tank with thermal shock.
- Kill the pump and release the pressure. Switch the pump off, then open a faucet until the water stops running. There is pressure in that system and it will find the one fitting you did not want it to find.
- Drain the fresh water tank. Its own drain valve, usually a pull or a twist under the belly. Leave it open.
- Open both low point drains. Hot and cold. On most trailers they are two coloured pipes hanging below the floor near the middle. Leave them open.
- Drain the water heater. Pull the anode rod on a Suburban, or the plastic drain plug on an Atwood, and let it run. Then open the pressure relief valve on top so it can breathe and actually empty.
- Open every faucet, both handles. Kitchen, bathroom, shower, outside shower, outside kitchen. Hold the toilet valve open. Leave them all open.
- Set the water heater bypass. Before any antifreeze goes anywhere near the pump.
The water heater is the one
A typical RV water heater holds six or ten US gallons. If you skip it, you have left roughly twenty five to forty litres of water sitting in an aluminium or steel tank inside an unheated trailer for four months. If you do not bypass it, you will pump four litres of antifreeze into it before any antifreeze reaches a single water line, and you will still not have protected the lines.
The places people forget
In no particular order, because the order changes with the floorplan: the outside shower, the outside kitchen sink and its own trap, the washing machine hookup behind a panel, the icemaker line on a residential fridge, the toilet sprayer wand, the city water inlet check valve, the filter housing if you have an inline filter mounted permanently, and on some fifth wheels a second, lower low point drain that only exists on the hot side.
There is also the water pump itself. A pump that has been run dry is not damaged, but a pump with water sitting in its head can crack, and a cracked pump head is not obvious until you pressurise the system in spring and find water running out of the bottom of a cabinet.
What a split actually costs
We are not a plumbing shop and we do not quote repairs, so we are not going to invent a repair figure. What we can tell you from moving units is what the damage looks like when we arrive to tow a trailer that was not winterised properly: a soft floor around the wet bay, a delaminated section of sidewall below a fitting that let go behind a wall, and in two cases we have seen, a fresh tank that split along a moulded seam and dropped forty gallons into the underbelly, where it sat all winter as ice. Water damage inside a laminated RV wall is not a repair, it is a section replacement.
None of that shows on a walk around in October. All of it shows in April.
Antifreeze or blow the lines
There are two methods in common use, people are surprisingly tribal about them, and the truth is that each one covers a gap the other leaves. The compressed air method gets water out of the pipes. The antifreeze method protects the places water will not leave. Doing both is not belt and braces, it is just doing the job.
The compressed air method
You need a blow out plug, which is a fitting that screws into the city water inlet and takes a standard air line, and a regulator so you are not putting shop pressure into a plastic water system. Common practice is to keep the air pressure well below the working pressure of the plumbing, and every blow out plug we have seen sold in Ontario comes with a pressure recommendation printed on the packaging. Read that number rather than one from the internet, because it is the manufacturer of the fitting you are actually using.
Then you work faucet by faucet. Air in at the inlet, one faucet open at a time, hot side then cold side, until only air comes out. Then the shower, then the outside shower, then the toilet. Then you go back and do it again, because the first pass moves water around inside the system as much as it moves it out.
- What air is good at. Long horizontal runs of PEX, the pump, the faucet bodies, the shower riser.
- What air cannot do. Clear a P trap. A P trap is a water seal by design. Air blows straight over the top of it and leaves the water sitting in the bend, where it will freeze and split the trap.
- What air often misses. The toilet valve, which holds a small volume behind a rubber seal, and any low spot in a run that sags between supports.
The antifreeze method
Non toxic RV antifreeze is a different product from the ethylene glycol in a car radiator and the two are not interchangeable. RV antifreeze is sold specifically for potable water systems. It goes in either through the pump, using a winterising kit and a length of tubing into the jug, or poured directly into the drains.
Pumping it through means the pump draws antifreeze instead of fresh water, and you open each faucet in turn until coloured fluid comes out, working from the fixture nearest the pump to the one furthest away. Hot and cold at each fixture. Then the toilet, then the outside shower.
Pouring it in means you skip the lines and go straight for the traps: a cup or so down each sink drain, the same down the shower drain, and enough into the toilet bowl to sit in the trap below it.
Bypass the water heater first
Every RV built in the last twenty years has a water heater bypass, usually one valve or three valves behind the fridge or under a bunk. If you pump antifreeze with the bypass open, the first several litres go straight into an empty water heater tank and stay there. That is expensive, it is pointless, and in spring you have to flush all of it back out.
Our own practice, for what it is worth
On units we winterise as part of a storage booking, we blow the lines with air first, then bypass the heater and pour antifreeze into every drain and trap, and we do not pump antifreeze through the supply lines at all. The reason is simple: a system that has been properly blown out has nothing left in the pipes to freeze, and antifreeze in the supply lines is four months of taste and a long flush in spring for no additional protection. If a system cannot be confidently blown out, for example because it has an odd run or a fitting we cannot reach, then we pump it.
That is our judgment, not a rule. Plenty of competent people pump every system every year and never have a problem. What is not a matter of opinion is that the traps need antifreeze in them either way.
The fresh water tank
The fresh tank gets drained in October and sanitised in April. Draining it is a valve. Sanitising it is where people go looking for a ratio on the internet, and where we found the most confusion of anything on this page.
What we could and could not verify about sanitising ratios
There is a figure that circulates in RV forums and articles, usually stated as 250 mL of bleach per 250 L of water and attributed to Alberta Health Services. We went and read the Alberta Health Services material this week. That exact wording is not on it, and Alberta Health Services publishes two different figures in two different documents, neither of which mentions recreational vehicles at all.
On the Alberta Health Services page on cistern disinfection and cleaning, which was created in April 2011 and last modified in February 2026, the instruction is: "Add 1 L of bleach to every 1000 L of water in the cistern (adding while filling the cistern will ensure good mixing)." The same page says "Allow the chlorinated water to sit in the cistern and plumbing system for at least 6 hours."
In their separate guidance for potable water haulers, published under PUB-0388-201906, the instruction is different: "Add 8 Litres of household bleach to every 1000 gallons of water", followed by "let the chlorine sit in the water tank and hose systems for a minimum of 20 minutes contact time" and "Rinse inside surfaces of the tank with potable water and drain to waste."
Both of those are real, published, current Alberta Health Services instructions, and they are for different situations: a household cistern that will sit, versus a commercial water hauling tank that is turned over constantly. Neither is written for an RV. We did not find any Canadian government or health authority document that gives a bleach ratio specifically for recreational vehicle fresh water tanks. If one exists we have not found it, and we are not going to attribute an RV specific ratio to an authority that never published one.
What Ontario publishes, and why it is relevant
The closest Ontario government guidance to an RV fresh water system is the province's page on disinfecting private water wells, updated 15 June 2026. It is written for wells, not RVs, and we say that plainly. But two of its instructions are about the process rather than the plumbing, and they are worth reading before you sanitise anything: "Let the chlorinated water stand in the system for at least 12 hours." and "Do not drink the water without boiling it until test results show the water is suitable for potable use."
On dosing, the province does not give a single universal ratio either. It says: "Calculate the amount of bleach needed (Figure 3). Table 1 gives the volume of bleach needed for common metric well sizes for each 3 m (metres) of water depth." In other words, even for wells, the province publishes a table keyed to volume rather than one number, which is exactly why a single memorised RV ratio should be treated with suspicion.
What we tell customers
Follow your RV manufacturer's own manual for the sanitising procedure and the dose, because that is the only document written for your actual tank. If the manual is gone, the three published sources above give you the shape of the job: a measured dose of ordinary unscented household bleach by tank volume, a long contact time, a full rinse until you cannot smell chlorine, and no drinking until it is flushed. We do not sanitise customers' fresh water systems ourselves and we do not pretend to be a water quality authority.
Draining it for winter
The tank drain is usually a separate valve from the low point drains, often on a short length of hose that hangs below the floor. Open it and walk away for twenty minutes. On a level trailer a fresh tank will not fully drain by gravity, because the outlet is rarely at the absolute lowest point of a moulded tank, and there is nothing to be done about that. A few litres of residual water in a large plastic tank with room above it to expand into is not the risk that a few millilitres in a rigid brass fitting is.
What you should not do is leave the tank full because "it is a big tank and it will not freeze solid". It will.
Black and grey tanks
Both tanks get emptied, both get rinsed, and both get left empty with the valves in the position your manual specifies. The order matters: black first, then grey, so the grey water flushes the hose and the outlet after the black tank has gone through it.
Doing it properly
- Black tank first, and let it run right down. Then close the valve, put water back in through the toilet or the flush inlet, and dump again. Twice if it has had a long season.
- Grey tank second. It carries soap and it will clean the hose out on the way past.
- Rinse the hose and the outlet. Then drain the hose completely, because a sewer hose with water in it freezes, splits, and is unusable in spring.
- A little antifreeze in each tank. Enough to cover the bottom and the valve seats. The valve blade and its seals are the part that fails, not the tank.
- Valves closed, caps on. Both, once everything is empty.
Why a full black tank is worse than it sounds
A black tank that freezes solid does not just sit there being frozen. It expands against the tank walls and against the valve body, and the valve blade is a flat piece of plastic sliding in a seal that was never designed to have ice pushed through it. The tank itself is usually ABS or polyethylene and has some give. The valve does not.
Then in April it thaws from the outside in, which means the valve area thaws first while the middle is still a block, and the first thing that happens when you pull the handle is that a small amount of liquid comes out and you assume it is empty. It is not empty. It is a bucket of ice with a wet edge.
Sensor readings after a bad winter
If your tank sensors read full all season no matter what, that is usually residue on the probes rather than a frozen tank, and it is a spring cleaning job. But a tank that read empty in October and reads full in April is telling you something happened. Do not force the valve.
If a unit comes into our yard with tanks that have not been dumped, we will tell you, but we will not dump them for you. We are a transport and storage operation, not a sanitation service, and there is nowhere legal to put it in a storage yard. Dump at the park before you leave, or at a municipal dump station on the way.
Propane, and the rules
Propane is the part of winterising people worry about most and need to do least to. The tanks stay where they are, the valves get closed, the regulator gets covered, and that is broadly it. The worry is worth answering properly though, because there is a lot of confidently wrong material about propane and cold weather.
Propane does not freeze in an Ontario winter
The National Institute of Standards and Technology publishes physical property data for propane, CAS registry number 74-98-6, in its Chemistry WebBook. The normal boiling point it gives is "Tboil | 231.1 ± 0.2 | K | AVG | N/A | Average of 17 out of 21 values". That is 231.1 kelvin, which works out to roughly minus 42 degrees Celsius.
Ontario does not do minus 42 in the places we work. So the liquid propane in your cylinder stays liquid all winter and the idea that it "freezes" is simply not what happens. You can read the NIST entry yourself at the NIST Chemistry WebBook.
What actually happens to propane in the cold
What does change with temperature is vapour pressure. A propane cylinder feeds an appliance with vapour boiling off the top of the liquid, and the colder the liquid, the less enthusiastically it boils, so the less pressure is available to push vapour down the line. A full tank has plenty of liquid surface and plenty of margin. A tank with two inches in the bottom on a minus 25 night has neither, and the symptom is a furnace that lights and then drops out, or a stove that will not hold a flame.
That is why the practical winter advice is to store the cylinders reasonably full rather than nearly empty, and it is also why a unit that is going to sit unused all winter with the gas off does not care either way.
The regulator, which is the part that actually fails
The regulator sits between the cylinders and the trailer, it is usually under a plastic cover, and it has a vent that must stay clear. Water gets into a regulator, freezes in the vent or the diaphragm, and then the regulator either locks up or fails to regulate. Both are bad, and one of them is dangerous.
- Cover it. If the plastic regulator cover is cracked or missing, replace it. It is a cheap part.
- Point the vent down. Most regulators are designed to be installed with the vent facing downward so water runs out rather than in. If yours has been remounted at some point, check.
- Do not wrap it in a bag. A plastic bag over a regulator traps condensation against it and stops the vent breathing. It is a common piece of bad advice.
- Close the cylinder valves. At the tank, hand tight, not with a wrench.
What the Ontario regulator actually adopts
Propane in Ontario is regulated by the Technical Standards and Safety Authority. In April 2026 the TSSA published a Code Adoption Document amendment under reference FS-281-26, published 8 April 2026 and effective 8 June 2026. Two sentences in it are directly relevant to anyone with a recreational vehicle.
The first sets the general propane code in force: "The CSA Standard B149.2:25 'Propane Storage and Handling Code' published in February 2025 by the Canadian Standards Association is adopted with the following amendments:"
The second is the one that matters for RVs specifically: "The CSA Standard B149.1:25 'Natural gas and propane installation code' published in 2025 by the Canadian Standards Association is adopted for the installation requirements for mobile homes and recreational vehicles."
In plain terms: if somebody works on the gas installation in your RV or park model in Ontario, the code that governs that work is CSA B149.1, in its 2025 edition, as adopted by the TSSA. That is not a winterising instruction. It is the reason we do not touch gas fittings on customers' units and neither should anyone without the ticket for it. Ours is a transport, levelling and storage business. Gas work is somebody else's licence.
A distinction we are going to be careful about
The TSSA also publishes a compliance page of propane storage rules with specific setback distances. It is written for retail propane cylinder exchange cabinets, the caged racks outside a hardware store or a gas bar. It is not written for a homeowner storing two twenty pound cylinders, and we are not going to pretend it is. We reproduce it below because the distances tell you what the regulator considers a sensible separation, not because it governs your driveway.
The retail cylinder storage rules, quoted in their real context
These are the TSSA's published bullets for propane cylinder exchange compliance, verbatim, and again: this is retail cabinet guidance.
- "Use no more than 4 metal cabinets. Each cabinet must contain no more than 500 lbs of propane (No more than 25-20 lb cylinders, whether full or empty)."
- "Store propane at least 1 metre (3 feet) from any building opening, such as doors or windows."
- "Store propane at least 8 metres (25 feet) from sensitive facilities such as schools, hospitals, etc."
- "Ensure cabinets are well-ventilated and locked."
- "Post 'No Smoking' and 'No Ignition' signs near/on the propane cabinet."
- "Store propane at least 6 metres (20 feet) from gasoline/diesel dispensers."
- "Do not use electrical equipment within 1.5 metres (5 feet) of the cabinet."
What a homeowner can reasonably take from that: propane cylinders belong outside, upright, ventilated, away from building openings and away from anything that makes a spark. Which is what everybody who works around propane will tell you anyway, and now you have seen where the numbers behind that instinct come from. You can read the page at the TSSA.
Cylinders off, or cylinders on?
We leave them on, valves closed, when a unit goes into our yard. Taking them off means two cylinders to store somewhere, two hoses hanging loose to get damaged, and two open connections to collect water and grit over four months. If you are storing at home and you would rather have the cylinders in a garage, that is a defensible choice too, but cap the connections and never store a propane cylinder inside a living space or a basement.
Batteries, all three chemistries
This is the section where generic advice does the most damage, because flooded lead acid, AGM and lithium iron phosphate want genuinely different things and the internet blends all three into one paragraph. We have gone to the manufacturers for this rather than to a forum.
Flooded lead acid and AGM
Trojan Battery Company publishes battery maintenance guidance, and the storage instructions are short and clear. The first one is the one that matters most: "Completely charge the battery before storing." The reason is temperature related, and Trojan states it directly: "Keeping a battery at a high state of charge will also prevent freezing." They also publish "Avoid locations where freezing temperature [sic] are expected."
That first pair of sentences is the whole lead acid winter story. A fully charged lead acid battery has a strong sulphuric acid electrolyte with a very low freezing point. A discharged one has an electrolyte that is much closer to plain water, and plain water freezes at zero. A flat lead acid battery left in an unheated Ontario yard in January can freeze, crack its case and be finished. A fully charged one, in the same yard, generally is not.
On self discharge, Trojan publishes that flooded batteries lose a meaningful percentage of their charge per month at room temperature and that valve regulated batteries such as AGM lose considerably less, and they give figures for both at a stated reference temperature. We are paraphrasing rather than quoting those specific figures deliberately, because that page mixes two visually similar degree symbols and we will not reproduce a temperature we cannot be certain we have transcribed exactly. The figures are on Trojan's maintenance page if you want them exactly as published.
The maintenance instructions we can quote cleanly are: "Batteries in storage should be given a boost charge when they show a 70% charge or less.", "If you store your batteries for an extended period of time, be sure to charge them fully every 3 to 6 months.", "Avoid direct exposure to heat sources, such as radiators or space heaters." and "During storage, monitor the specific gravity (flooded) or voltage."
- Charge it fully first. Not mostly. Fully, and let the charger finish.
- Disconnect it. A trailer with the battery connected is running propane detectors, radio memory and stereo parasitic draw all winter, and that is exactly how a charged battery becomes a flat one by February.
- Somewhere cool, dry and not freezing if you can manage it. A shelf in an unheated garage beats a snowbank in a yard.
- Top it up during winter. Trojan's boost charge instruction above is the reason.
- Not on bare concrete. Modern cases make this less of an issue than it was, but a board under it costs nothing.
Lithium iron phosphate
Lithium is the chemistry where cold storage advice inverts, and the critical fact is that lithium batteries do not merely charge poorly below freezing, they are typically prevented from charging at all by their own battery management system. Battle Born, one of the more widely used brands in North American RVs, publishes this on two different pages of its own site, and the two pages do not give the same number.
On the winterising page the statement is: "Our batteries have protections that will not allow a charge if their internal temperature is less than 24°F." On their educational page about temperature limits the statement is: "LiFePO4 batteries should not be charged below approximately 25°F unless they are equipped with internal heating."
We are pointing that out rather than quietly picking one, because it is exactly the kind of small inconsistency that ends up copied a thousand times as a hard specification. One degree Fahrenheit does not change what you should do. What matters is the principle, which the same educational page states as: "To prevent this, the Battery Management System (BMS) automatically blocks charging when temperatures fall outside safe limits."
The consequence for an Ontario winter is straightforward. A lithium bank sitting in a trailer with a solar panel on the roof is, for much of January and February, not being charged no matter how bright the day is, because its own BMS is refusing the charge. That is the battery protecting itself and it is the correct behaviour. It also means you cannot rely on solar to hold a lithium bank up over an Ontario winter.
Battle Born's storage instruction is therefore about state of charge going in, and about disconnecting: "If the batteries are stored without a charge, their levels could dip below what the internal Battery Management System, or BMS, can protect over the winter season." and "Disconnect the batteries from the system using your disconnect switch or removing the positive main battery cable." They give their self discharge as "Battle Born Batteries have a meagerly [sic] self-discharge rate of 2-3% a month on average."
They also publish a storage temperature range and a threshold below which they recommend removing the batteries to a warmer location entirely. We are paraphrasing those two figures rather than quoting them, for the same transcription reason given above, and you can read them exactly as published on Battle Born's winterising page and their temperature limits page.
The practical lithium rule
Charge it to whatever your manufacturer recommends for storage, disconnect it, and if the storage location gets seriously cold, take the batteries out and put them somewhere that does not. Discharging in the cold is generally tolerated; charging in the cold is what the BMS blocks. Do not fit an aftermarket "trickle charger" to a lithium bank in an unheated yard and assume it is doing something.
A comparison, because the differences are the point
| Question | Flooded lead acid and AGM | Lithium iron phosphate |
|---|---|---|
| Store it charged? | Yes, fully. Trojan ties state of charge directly to freeze resistance. | Yes, per the manufacturer's stated storage level. |
| Risk if stored flat | Electrolyte can freeze, case can crack, battery is finished. | Can drop below what the BMS can protect. |
| Charging in the cold | Slower and less complete, but not blocked. | Blocked by the BMS below the manufacturer's threshold. |
| Solar over an Ontario winter | Can help hold a charge if the controller is set correctly. | Cannot be relied on. The BMS may refuse the charge for weeks. |
| Mid winter top up | Trojan instructs a boost charge at 70% or less. | Check state of charge; charge somewhere warm if it needs it. |
Tires and weight on the wheels
Tires are the part of a stored RV that ages whether you use it or not, and the part most likely to be the reason a unit that sat all winter has a problem on its first highway trip in May. We tow other people's trailers for a living, so we look at a great many stored tires, and the two things we see are chronic underinflation and sidewalls that have been sitting in one position on a soft surface for four months.
Pressure, and what the cold does to it
Transport Canada publishes a tire inflation booklet called Riding On Air, credited "© Her Majesty the Queen in Right of Canada, represented by the Minister of Transport, 1989, revised 2006." It gives the figure that matters for winter storage: "Remember that tires lose pressure when the air temperature gets colder (about 7 kPa or 1 psi for every 5°C drop in temperature)."
Work that through for an Ontario storage season. A tire set to placard pressure on a mild fifteen degree afternoon in October, sitting in a yard on a minus twenty morning in January, has seen a thirty five degree drop. At roughly one psi for every five degrees, that is about seven psi lost to temperature alone, with nothing wrong with the tire at all. On a trailer tire running in the sixty five to eighty psi range that is meaningful but survivable. On a tire that was already ten psi low in October it is not.
Transport Canada also publishes the sentence that explains why people do not notice: "A tire can lose up to half its air pressure and not appear to be flat." That is the whole argument for a gauge rather than a look. And on when to measure: "Measure the pressure when your tires are cold", which for a stored unit is any time, because it has not been driven.
A figure we are not going to print
A specific number circulates in RV winterising articles, usually given as a tire losing about fifteen psi over a winter, and it is often attributed to Transport Canada. We read the Transport Canada booklet this week and there is no fifteen psi figure in it. What is in it is the temperature relationship quoted above and the half its pressure sentence. Use those, and use a gauge on your own tires, rather than a number nobody published.
The other published figure, and its ambiguity
The U.S. Tire Manufacturers Association publishes a tire care page with a similar rule of thumb stated in imperial units: "Note that inflation pressure increases (in warm weather) or decreases (in cold weather) one to two pounds for every 10 degrees of temperature change."
Read that carefully. The page does not state whether those are degrees Fahrenheit or degrees Celsius, and the difference between the two readings is nearly a factor of two. We are not going to guess on your behalf. For a Canadian audience with a Canadian thermometer, use the Transport Canada figure, which is unambiguous: about 7 kPa or 1 psi for every 5 degrees Celsius.
A document we could not read
The USTMA also publishes a longer Tire Care and Safety Guide as a PDF, which is the document usually cited for tire ageing, ozone damage and long term storage advice. We tried to retrieve it twice during this build. The first attempt timed out on read and the second returned a server error, and the landing page carries no body text, only the file link. Nothing from that guide is quoted or paraphrased anywhere on this page. If you want tire ageing guidance, get it from your tire manufacturer or your RV dealer, not from us repeating something we could not open.
Weight, flat spots and what we actually do
A tire that carries load in one position for months develops a flat spot. On a modern radial in a mild climate that usually works itself out within a few kilometres of driving. In an Ontario winter, where the rubber is cold and stiff for months, it can take considerably longer, and on an older tire it may not come out at all.
- Get them off the dirt. A tire sitting on grass or bare soil sits in moisture all winter. Boards, pavers or gravel under each tire is a five minute job that pays for itself.
- Cover them if they face the sun. Tire covers are cheap. A south facing tire gets far more UV over a winter than people expect, because the snow reflects it upward as well.
- Take some weight off if you can. Jack stands or blocking under the frame that reduce, rather than eliminate, the load on the tires. On a stored trailer we block under the frame at the manufacturer's designated points, which supports the unit and takes some of the standing load off the axles.
- Do not deflate them. A soft tire deforms more, not less, and an underinflated tire that gets rolled onto a trailer in April is a tire that can be damaged in the first hundred metres.
- Check them mid winter. Twenty minutes with a gauge in January, per the arithmetic above.
How we block a stored unit is the same method we use when we set one up permanently, and it is described in detail on the RV levelling and blocking page. On our own storage bookings that blocking is included in the monthly rate rather than charged as an add on.
Roof, seals and seams
The roof is where four months of snow load, freeze and thaw meets whatever condition your sealant was already in. Nothing about winter creates a roof leak from nothing. Winter finds the one that was already starting.
What to inspect before it goes away
- Every penetration. Vents, fans, the antenna, the air conditioner, the plumbing vent, the fridge vent, the solar mounts if you have them, and any screw head that goes through the membrane.
- The front and rear seams. Where the roof membrane meets the front and rear caps is the single most common failure point on a travel trailer, because it flexes every time the unit is towed.
- The awning rail. A long horizontal run of sealant on the side of the trailer that nobody looks at until water is running down the inside of a window.
- Lap sealant condition. Cracked, shrunken, lifted at the edges, or chalky and crumbling when you press it with a thumbnail. All four mean it needs redoing.
Match the sealant to the roof
EPDM, TPO and fibreglass roofs do not all take the same product, and putting the wrong self levelling lap sealant on the wrong membrane can soften it. If you do not know which roof you have, find out before you buy a tube. We are not a service shop and we do not reseal roofs, so this is not us selling you anything, it is us telling you what we see go wrong.
Snow load, and whether to clear it
Opinion here is divided and we are going to give you both sides honestly, because we do not think there is one correct answer for every unit.
The case for clearing snow off an RV roof: a lot of wet snow is a lot of weight on a structure that was designed for aerodynamic loads and a person walking on designated points, not for a metre of accumulation. Repeated freeze and thaw cycles turn that into ice, and ice at the low edges is what forces its way under sealant.
The case against: getting onto an icy RV roof to clear snow is a genuinely dangerous thing to do, RV roofs are walkable only in specific places on specific models, and most of the damage we actually see from snow clearing is done by the shovel rather than by the snow. A plastic roof rake used from a ladder, gently, from the edge inward, is a compromise. A metal shovel is not.
What we do in our own yard: we do not climb on customers' roofs. We look at them from a ladder after heavy events, and if something needs attention we call the owner. Nobody with sense goes up on an RV roof in February to do a favour.
Covers, tarps and shrink wrap
This is the section where we are going to be blunt, because we see the results every spring. A proper RV cover helps. A blue poly tarp actively hurts. Shrink wrap is excellent and expensive. Doing nothing is a perfectly respectable option and is better than doing it badly.
A proper cover
Made for RVs, sized for your unit, breathable rather than waterproof, with reinforced corners and a way of securing it that does not involve wrapping a rope around a tire. The reason breathability matters is that an RV under a sealed cover is a large sealed container full of air that goes through a temperature cycle every single day, and every one of those cycles moves moisture. A cover that lets vapour out and keeps liquid water off is doing the job. A cover that does neither is a bag.
- Fit it properly. Loose fabric flapping in a February wind will sand the finish off a sidewall and tear the graphics.
- Pad the corners. Gutters, ladders, awning arms and the corner of a slide out are the places a cover wears through first. Foam pipe insulation taped over the sharp bits works.
- Do not cover a wet unit. Put it on dry, on a dry day.
- Check it mid winter. A cover that has come adrift and is whipping against the side of a trailer does more damage in a week than four bare winters would.
Why the blue tarp is worse than nothing
Polyethylene tarps are waterproof and completely non breathable. Water that gets in, and it always gets in, cannot get out. So a tarped trailer spends the winter with liquid water trapped against the roof membrane and pooling in every low spot, which is exactly the condition that lifts sealant. The tarp material itself is abrasive against gelcoat and vinyl graphics, and it moves constantly.
We have towed units into our yard in April with the tarp still on and a distinct clean rectangle on the sidewall where the graphics used to be. If a tarp is genuinely all you have, use it on the roof only, secured so it cannot move, and accept that you are managing a compromise rather than protecting the unit.
Shrink wrap
Marine style shrink wrap over a frame, with vents installed, is the best protection available and it is priced accordingly. It is a professional job. Done properly it includes vents specifically so the unit can breathe, which is the whole point. Done improperly, without vents, it is the blue tarp problem in a more expensive material. If you go this route, ask the installer directly how many vents they are fitting.
What we do and do not do
We do not supply, fit or sell covers or shrink wrap. Units in our yard are stored uncovered, blocked and levelled, on a fenced outdoor site. If you want yours covered you are welcome to come and do it, or to have someone do it, and we will tell you honestly whether we think the cover you have turned up with is going to help.
Rodents, and how they get in
Every spring somebody opens a trailer that was sealed up in October and finds a nest in the furnace return, wiring chewed behind a panel, and droppings in a cutlery drawer. It is the single most common winter storage damage we see that has nothing to do with water. And it is almost entirely preventable, because the fight is won by closing holes, not by putting poison inside.
How small a hole are we actually talking about
The United States Centers for Disease Control and Prevention, on its page on sealing up against rodents last reviewed 8 April 2024, states it plainly: "Mice can fit through a hole the width of a pencil (1/4 inch or 6 millimeters in diameter)."
Ontario publishes its own guidance, written for livestock and poultry facilities rather than RVs, on a page dated 4 May 2026. It gives gap sizes twice, and this is worth showing you in full, because the two statements on that single provincial page do not match each other.
In the prose, the province says rats get through "an opening as small as 1 cm (centimetres) (1/2 in. (inches))" and mice through openings "as small as 0.6 cm (centimetres) (1/4 in. (inches)), or less, in diameter". In the table further down the same page, the figure given for rats is "12 mm (millimetres) (0.5 in. (inches))" and for mice "6 mm (millimetres) (0.2 in. (inches))".
| Animal | Ontario page, in the prose | Ontario page, in the table | Do they agree? |
|---|---|---|---|
| Rat | 1 cm, given as 1/2 in. | 12 mm, given as 0.5 in. | No. 1 cm is not 12 mm, though both imperial figures are the same. |
| Mouse | 0.6 cm, given as 1/4 in. | 6 mm, given as 0.2 in. | Partly. 0.6 cm is 6 mm, but 1/4 in. is 0.25 in., not 0.2 in. |
We are showing you both rather than picking the one we like, because that is what the source says and because the disagreement does not actually change what you should do. Round down. Assume a mouse gets through anything a pencil fits through, which is where the CDC and the low end of the Ontario figures agree, and assume a rat gets through anything you could push a thumb into. Then go and find those holes.
Where the holes are on an RV
Almost never where people look. The door and the windows are fine. It is the underside and the utility runs.
- Every plumbing penetration through the floor. The drains, the fresh water fill, the pump lines, the outside shower. Most factory holes are cut generously and sealed carelessly.
- The wiring pass throughs. Where the harness comes through the floor or the front wall, and where the slide out wiring runs.
- The furnace and water heater vents. Both are, by design, holes in the side of the trailer with a grille over them. A grille is not a rodent barrier.
- The refrigerator vent. A large opening on the sidewall and a matching one on the roof, connected by an open cavity that runs right up the back of the fridge into the ceiling.
- The gap where the underbelly meets the frame. On many trailers this is a coroplast sheet held on with screws, and once one corner is loose the entire underbelly is an insulated apartment.
- Slide out seals. When the slide is in, the seal compresses. When it is out, there is a gap along the bottom. Store with slides in.
- The propane locker floor. Vented by design, and connected to more of the trailer than you think.
What to fill them with
The CDC's published instructions are specific about materials, and they are the same materials Ontario names: "Fill small holes with steel wool. Put caulk around the steel wool to keep it in place or use spray foam." and "Use lath screen or metal, cement, hardware cloth, or metal sheeting to fix larger holes."
The CDC page also contains one instruction that could have been written for exactly this situation: "Fix gaps in trailer skirting and use flashing around the base of the house." If you have a park model with a skirt around the bottom, that sentence is your winter job.
Ontario's version of the same instruction is "Use coarse steel wool, hardware cloth or sheet metal to cover/fill any entrances." and, on dealing with what is already there, "Block off all entrances into walls and destroy all nesting material."
Why steel wool and not expanding foam alone
Both published sources name steel wool or metal first and treat caulk or foam as the thing that holds it in place. That ordering is deliberate. A mouse chews through cured expanding foam without much difficulty. It does not chew through coarse steel wool or hardware cloth. Foam on its own is a seal against draughts, not against rodents.
Housekeeping, which matters more than people think
Ontario's guidance for facilities includes a storage rule that translates directly to an RV storage yard and to a garage: "Keep piles of lumber and miscellaneous equipment 24-30 cm (centimetres) (9-12 in. (inches)) off the floor and at least 24 cm (centimetres) (9 in. (inches)) out from a wall." The principle is that rodents want cover and travel along edges, so anything stacked against a wall at ground level is a highway.
The same page gives a foraging range that explains why a clean trailer beside a messy shed is still at risk: "The range for rats is up to 45 m (metres) (148 ft (feet)), for mice 9 m (metres) (30 ft (feet))". Nine metres is nothing. It is the width of a driveway.
It also gives a construction figure for permanent buildings that is worth knowing if you are building a pad or a shed for a park model: "Initial construction footings should extend 0.5 m (metres) (19 in. (inches)) into the ground, with an apron that extends 0.2 m (metres) (8 in. (inches)) outward." That is for a building, not for a trailer, and we are not going to pretend it is an RV specification.
Inside the unit
- Every scrap of food out. Including the spice rack, the coffee, the pasta at the back of the cupboard, the dog treats and the emergency chocolate. Sealed plastic is not sealed to a mouse.
- Soap, candles and toothpaste too. All of it is food to a rodent.
- Cushions and mattresses on edge or out. Nesting material is the other half of what they want.
- Drawers and cupboards left open. Counterintuitive, but a mouse that gets in and finds nowhere hidden to nest does less damage than one that sets up in a closed drawer.
- Traps, not poison, if you use anything. Poison inside a sealed trailer means an animal dies somewhere you cannot reach it, and you will spend the summer smelling it.
Inside: moisture and mould
A closed RV in an Ontario winter goes through a daily temperature swing and has no ventilation. Whatever moisture is inside it in October is still inside it in April, moving between the air and every surface, condensing on the coldest thing available every night. That is how a perfectly dry trailer grows mould in a cupboard.
Where the moisture comes from
Some of it is already in the air when you close the door. Some of it comes from damp fabric, from a wet towel left in a cupboard, from the P traps you have just filled with antifreeze, and from the ground under the trailer if it is parked on grass or bare soil. And some of it is manufactured inside: a small amount of air exchanges through vents and gaps every day, bringing in humidity that condenses when the temperature drops overnight.
What to do about it
- Leave every interior door and drawer open. Cupboards, wardrobes, the bathroom door, the shower door. Air that cannot circulate is air that condenses in the corner it is trapped in.
- Fridge doors propped. Most RV fridges have a catch designed for this. If yours does not, wedge them.
- Lift the mattresses. On edge, or on their side against a wall, so the underside is not sitting against a cold platform for four months.
- Take the soft goods home. Bedding, towels, throw cushions, coats. They hold moisture and they are nesting material.
- Desiccant tubs, not a running dehumidifier. A calcium chloride moisture absorber in the bathroom and one in the main living area costs very little. An electric dehumidifier needs power all winter and, if it overflows or freezes, causes the problem it was there to prevent.
- Leave a roof vent cracked if it is safe to do so. A vent cover that keeps rain and snow out while allowing airflow is the single best thing you can do about interior moisture. Without one, a cracked vent lets snow in, so use judgment.
Do not seal it airtight
The instinct to tape over every vent to keep the weather out is exactly backwards. An RV needs to breathe over the winter or it becomes a condensation chamber. Keeping rodents out is about closing small holes at the bottom. Keeping mould out is about air moving through the top.
Fridge, furnace and vents
The appliances are the quick section, because most of them want nothing more complicated than to be turned off, emptied and left alone. The exceptions are the fridge, which will grow mould if you close it, and the vents, which are rodent doors.
The refrigerator
- Empty and clean it. Including the door shelves and the crisper, and including whatever has slid underneath the crisper.
- Dry it out. Wipe it down and leave it a day with the doors open before you close the trailer up.
- Prop both doors. Fridge and freezer. This is not optional.
- Turn it off at the panel, and if it is an absorption fridge running on propane, the gas is off at the cylinder anyway.
- A box of baking soda in each compartment, or a moisture absorber. Cheap insurance.
The furnace
Turn the thermostat off and leave the furnace alone, but look at the exhaust and intake on the outside of the trailer before you walk away. A furnace vent is a warm, sheltered, textured cavity that leads directly into the underside of the RV, and it is one of the most common nesting sites we find. Some owners fit purpose made vent screens over winter. If you do, put a note on the thermostat and a note in your phone, because running a furnace with a blocked vent in spring is dangerous.
The water heater
Already drained and bypassed, per the plumbing section. Leave the drain plug or anode out over winter so the tank can breathe and any residual moisture can evaporate, and put a screen over the outside vent for the same rodent reason as the furnace. Same warning applies: write yourself a note.
Air conditioner, awning and slides
- Air conditioner. Nothing to do beyond making sure the shroud is intact and not cracked. A cracked shroud fails properly in a February wind.
- Awning. Retract it, and retract it dry. An awning rolled up wet in October is an awning with a mould pattern printed on it in April. Extend it on a dry afternoon, let it dry fully, then roll it in.
- Slide outs in. Both for the seals and because an extended slide is a snow shelf and a rodent ramp. Clean and treat the seals with a rubber conditioner before you bring them in.
- Stabiliser jacks. Down onto blocking, not straight onto soil, and not carrying real weight. They stabilise, they do not support.
Motorhomes and generators
Everything above this line applies to any RV with plumbing in it. A motorhome adds an engine, a transmission, a chassis battery, a fuel system and often a generator, and those are the parts that make winter storage a different job. They are also the parts we are least qualified to speak about, so this section is deliberately careful about where our knowledge ends.
The honest position on running it over winter
Ask ten motorhome owners whether you should start the engine over the winter and you will get a genuine split. We are not going to pretend there is a settled answer, because there is not one.
What we will say without hedging is that the middle option is the bad one. Walking out in January, starting a cold engine, letting it idle for five minutes and shutting it off is worse than leaving it alone. It is long enough to put condensation into the exhaust, the crankcase and the oil, and nowhere near long enough to boil any of it back out. If you are going to run it, run it until it is genuinely at operating temperature and preferably under some load, which in practice means driving it, not idling it. If you are not going to do that, store it properly and leave it shut off until spring.
The same logic applies to the transmission and the differential. A short idle in park does nothing for either one.
Fuel
- Stabiliser, added before the last drive. The point of the last drive is to get treated fuel all the way through the lines, the filter, the pump and, on a carburetted generator, the bowl. Adding stabiliser to the tank and then parking it immediately treats the tank and nothing else.
- Tank level is the argument nobody wins. One camp fills the tank so there is less air in it to condense moisture. The other keeps it low so there is less old fuel to deal with in spring. We are not going to pretend we have measured this. Your engine manufacturer has a position on it in the owner's manual and that is the one to follow.
- Diesel is a different question. Diesel owners have a cold flow and gelling problem that gasoline owners do not have, and it is a real one in an Ontario January. We looked for a Canadian published specification we were prepared to quote on this page and we did not find one we could read in full, so we are not going to invent a temperature or a blend number. Ask your fuel supplier and your engine manufacturer. That is a real answer, not a dodge.
- Fill the tank before it goes to sleep if you are filling it, not after. Fresh fuel sitting all winter is still better than half a tank of fuel that has already spent a summer in there.
Oil, coolant and the jobs that belong to a shop
Used engine oil carries combustion acids and water. Leaving it in a block for five months is a common thing to avoid, and the usual practice is to change the oil and filter as the last job of the season rather than the first job of the next one. We do not do that work and we are not going to bill you for an opinion about it, but every motorhome owner we deal with who has been doing this a long time changes the oil in the fall.
Coolant is the one people skip. Antifreeze does not stay at its rated concentration forever, and a coolant mix that has been diluted by a few top ups with plain water over a couple of summers is not protecting to the temperature printed on the jug it came from. A tester costs very little and takes two minutes. Have the mix checked before the cold, not after the block has already been through a February.
Where our licence ends
We are a transport, levelling and storage business. We are not a mechanical shop, we do not service engines, generators or gas appliances, and we do not sign off on anybody else's work. If a section of this guide reads like we are being vague on purpose about engine internals, it is because we would rather send you to a licensed technician than guess in print.
The chassis battery is a second battery
This one catches people every year. A motorhome has a house bank and a chassis battery, and the winterising routine everybody remembers is the house bank. The chassis battery sits under the hood with the engine computer, the alarm, the radio memory and whatever else draws a small constant current, and it goes flat quietly. Everything in the battery section above applies to it, including the part about a discharged lead acid battery freezing at a temperature a charged one shrugs off.
Disconnect it or put it on a maintainer, the same as the house bank, and if the coach has a battery disconnect switch, know which bank that switch actually isolates. On plenty of coaches it isolates one and not the other.
The generator
- Treat its fuel with the same stabiliser and then run it long enough for the treated fuel to reach the carburettor. On a portable unit, some owners shut the fuel valve and run it until it stalls so the bowl is empty. Both approaches are in common use and both have defenders.
- The exercise interval belongs to your manual. Manufacturers publish different run intervals and different load requirements and we are not going to average them into a number that matches nobody's warranty. Look it up for your unit.
- The exhaust outlet is a rodent door. It is warm sometimes, sheltered always, and it leads somewhere hollow. Screen it the way you screen the furnace and water heater vents in the rodent section, and write yourself a note so it comes off before it runs again.
- Never run a generator with snow banked against the exhaust, under a cover, or in a closed space. A blocked exhaust puts carbon monoxide where you are, and it does it silently.
The things that seize
- Leave the parking brake off and chock the wheels instead. Shoes left clamped against a damp drum for five months can rust to it. Chocks on both sides of at least one axle, on both sides of the unit, are the usual substitute. If the coach is on a slope, deal with the slope rather than relying on the brake.
- Lift the wiper blades or pull them off. Rubber left pressed to cold glass all winter takes a set and smears in April.
- Treat the door and bay seals with a rubber conditioner so they do not freeze to the frames and tear when somebody yanks a bay door open in a mid winter check.
- Fuel filler, water fill and shore power doors get the same treatment and a check that they actually latch. A bay door that pops open in a January wind fills with snow.
One more thing that belongs here rather than further down: a motorhome is a self propelled vehicle for plate and insurance purposes, which puts it in a different position from a travel trailer. The plates and insurance section below covers what the province actually publishes about that, including the list of plate types that do not renew automatically.
Where you park it
Half the problems we get called about in spring are not winterising failures at all. They are site failures. The plumbing was done properly, the battery was fine, and the unit still came out of the winter with a door that will not close and a frame sitting an inch and a half out of true, because it spent five months on ground that moved.
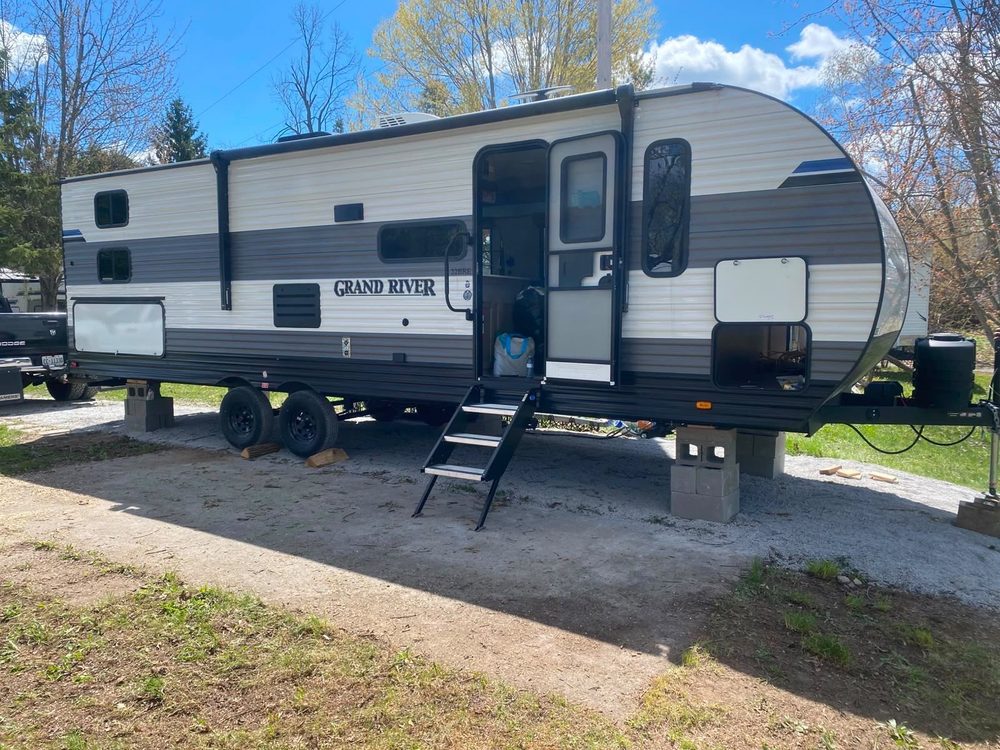
Ground first, everything else second
The order of preference we work with, best to worst, is compacted gravel, then a concrete or asphalt pad, then firm grass over well drained soil, then anything else. That gravel is at the top and not concrete is not a mistake. Gravel drains, it does not hold a sheet of ice, and it forgives a little movement without cracking. Concrete is excellent when it is a proper pad and awkward when it is a thin slab over soft fill, because a thin slab lifts as one piece and then does not come back down flat.
What actually happens under a badly chosen site is not complicated. Water gets into the soil in November, freezes, and the ground lifts. It does not lift evenly, because the soil is not uniform and the loading from the unit above is not uniform either. Then in March it thaws from the top down and the whole thing settles, again unevenly. A trailer that went in level in October comes out in April with one corner high, and everything that is supposed to be square in that box, meaning the door, the slide, the windows and the frame itself, has spent the winter being twisted.
The defence is spreading the load. A jack pad or a stack of blocking sitting on a wide, solid base moves less than the same jack pushed into wet soil, because the pressure is lower and because a wide footing bridges a soft spot instead of sinking into it. We go through the sizing and the stacking rules on the RV levelling and blocking page, and that work is part of what happens when a unit comes into our yard rather than an extra line on the invoice.
Water is the enemy of the site as well as the plumbing
- Do not park in the low spot. Wherever the water goes when the snow melts is where the ice forms first and thaws last. A unit sitting in that spot has its blocking in a puddle for weeks.
- Look at the ground in a rainstorm, not on a dry day. A site that looks fine in October can be the drainage channel for half a field. The cheapest way to find out is to go and look while it is raining.
- Keep the tires out of standing water where you can. Long soaks are not what tires are built for, and it is one more reason to have blocking under them rather than bare ground.
- Mind the roof runoff of anything nearby. Parking tight against a barn or a shed puts your roof under somebody else's eave, which in an ice storm is where a load of ice lands.
Trees, wires and what comes down out of them
A tree looks like shelter and behaves like a hazard. Over an Ontario winter a mature limb loaded with freezing rain comes down with enough force to go through a roof membrane, and it does not need to be a big limb. Sap and needles stain and hold moisture on the roof. Squirrels use branches as a bridge onto the roof and then look for a way in, which puts you back in the rodent section. Shade also means the snow on that side never melts off.
Overhead wires are a hard no, both for what can come down and because moving a tall unit under a service drop is a job with a real consequence attached. And if the site is close to a plowed road, be aware that what comes off a plow is not just snow. It is salt and grit at speed, and it goes on the side of the trailer.
Can a truck get to it in February?
This is the question almost nobody asks in October, and it is the one that decides whether a mid winter problem is a phone call or a disaster. If your unit needs to come out because of a fire, a flood, a roof failure, a sale or a family emergency, somebody has to be able to reach it with a truck and get a trailer turned around. Think about the gate width, the turning room, whether the lane gets plowed, and whether the ground under the lane will carry a loaded truck in a March thaw. A site you cannot reach for four months is a site you have to be very confident about.
The by-law question we did not answer for you
Check your own municipality
Whether you are allowed to store an RV on a residential property over winter, where on the lot, for how long, and whether it may sit on the street, is set by municipal by-law and it is not the same in every town we serve. We did not read the by-laws for all ten of our service areas for this guide, so we are not going to print a rule or a by-law number here that we did not verify. Call your municipal office or check your town's by-law page before you commit to a spot in a front yard or on a road allowance. It is a five minute call and it is a lot cheaper than an order to move it.
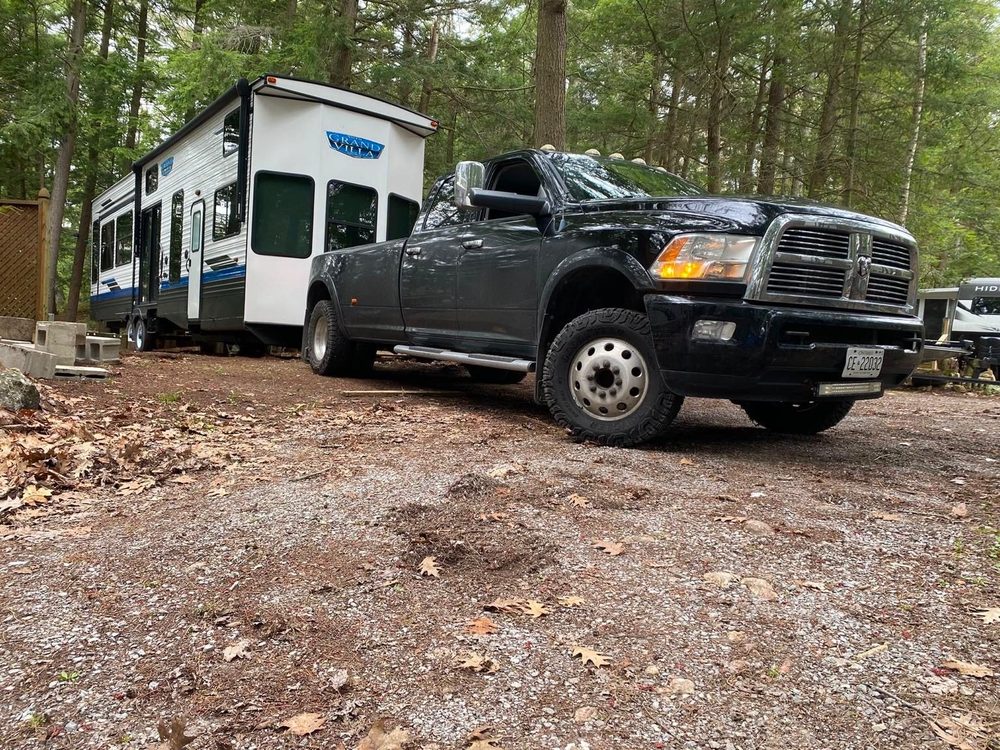
What our storage includes
Everything above is what to do. This is what we do, with the actual numbers, so you can price the alternative honestly instead of guessing.
| What it is | Detail |
|---|---|
| Monthly rate | $85 to $125 a month, depending on the size of the unit |
| Type of storage | Outdoor, fenced, in Beaverton |
| Blocking and levelling | Done on arrival, included in the monthly rate |
| Tow in and tow out | Quoted separately, because it depends where the unit is coming from |
| Deposit | None |
| Payment | On completion, by cash, credit card, debit or e transfer |
| Notice we normally want | 24 to 48 hours, with same day when it fits the schedule |
| Towing capacity | Up to 30,000 lb on a 30 foot gooseneck |
| Insurance we carry | $2 million liability, $150,000 cargo, $150,000 non owned trailer |
| Ontario CVOR | 204-617-206 |
What is actually included, in plain terms
- The unit gets blocked and levelled when it arrives. Not parked and left on its own jacks in soft ground. That is the single most valuable thing in the whole arrangement and it is the thing most yards charge for or simply do not do.
- It goes on a site we chose, which means we have already dealt with the drainage, the trees and the access questions in the section above on your behalf.
- We look at the yard after heavy weather. From the ground and from a ladder. Nobody climbs on a customer's roof, and if something needs attention we call the owner rather than deciding for them.
- Getting it in and out is a phone call, because the same crew that stores it is the crew that tows it. There is no coordinating between a yard and a separate transport company.
What is not included, said plainly
- It is outdoor storage, not indoor. It is fenced, it is on ground we control and it is levelled, but it is under the sky. If you want a heated indoor building, we are not that and we will tell you so on the phone.
- We do not winterise the plumbing for you. The draining, the antifreeze, the bypass and the tanks are the owner's job or a service shop's job, and the unit should arrive already done. We tow, block, level and store. That is the licence we hold and that is the work we stand behind.
- We do not cover units as a service. Most of what sits in our yard is stored uncovered, blocked and levelled. If you want yours covered, fit a proper cover before it comes in.
- We do not service engines, generators or gas appliances. Said twice on this page on purpose.
The guarantee, in the owner's own words
If a unit we set up shifts or moves because of our workmanship, we come back and redo the job at no charge. Weather and ground conditions are outside that, and we say so up front.
If you want the storage page itself, with the site details and the booking process, it is here: RV and trailer storage. If what you actually need is the tow into storage rather than the storage itself, that is the RV and trailer transport page, and what it costs is broken down properly on the RV transport cost guide. If the unit is a park model or a mobile home rather than a trailer, that is a different job again and it lives on the park model and mobile home moving page.
Plates and insurance while it sits
This is the section where we are the most careful, because we are a transport and storage company and not an insurance broker, and because the wrong decision here is the one that costs the most. So we are going to do something simple: quote what the Province of Ontario actually publishes, tell you where the traps are, and then tell you to phone your own broker before you change anything.
Everything quoted below is from the Ontario government page Register and insure a vehicle in Ontario, which showed an update date of August 05, 2025 when we read it for this guide.
What the province says about coverage in storage
Ontario publishes that coverage can be reduced while a vehicle is stored. The page states: "While the vehicle is in storage, you can remove the required road, liability and accident benefits insurance."
Read that sentence carefully, because people read it as permission to cancel the policy and it does not say that. It says the required road, liability and accident benefits portion can come off a vehicle that is in storage. It says nothing about the coverage that actually pays out when a stored unit burns, is stolen, is vandalised or has a tree come down on it, which is the coverage most owners keep in place all winter for exactly that reason.
What you should do with that sentence is take it to your broker as a question, not act on it as an instruction. The questions worth asking are whether your policy cares where the unit is stored and whether it needs to be told the address, what happens to your claims history if you reduce coverage and then reinstate it, and whether there is any gap between the day you reduce it and the day you put it back on before the first tow of the season.
The plate renewal trap
Here is the part that catches people, and it follows directly from the sentence above. The same page states: "For your licence plate to renew automatically you must have valid insurance and no outstanding fines or tolls."
So a motorhome owner who reduces coverage for the winter without thinking about the plate can end up on the wrong side of an automatic renewal. And in any case, motorhomes are not on the automatic list to begin with. The province publishes that automatic renewal does not apply to a specific set of vehicles: "Licence plates will not be automatically renewed for: commercial and business vehicles, motorhomes, vehicles manufactured before 1983, buses and school buses, off-road vehicles and snowmobiles, trailers".
Two of those entries are the whole audience for this guide. If you own a motorhome or a trailer, your plate is not renewing itself while you are not looking, and you should not assume otherwise because your car does.
Trailers are a different animal again
A trailer in Ontario is registered once rather than annually, which is why trailer owners rarely think about this at all. We covered the registration cost and that once only structure, with the province's own trailer page cited, in the RV transport cost guide. It is worth knowing the difference before you go looking for a renewal notice that is never going to arrive.
If you are taking the plates off entirely
Some owners with a motorhome that is genuinely off the road for a long stretch take the plates out of service. On that, the province's page says: "If you are not going to use your old licence plates, you can return them to a ServiceOntario centre." That is the whole of what we are prepared to tell you about it, because the consequences of an unplated vehicle for insurance, for storage and for the first drive of the season are a conversation with a broker and with ServiceOntario, not with a towing company.
What our insurance does and does not do for you
We carry $2 million liability, $150,000 cargo and $150,000 non owned trailer coverage, and we run under Ontario CVOR 204-617-206. That coverage exists for the work we do, which is moving your unit. It is not a substitute for your own policy on a unit sitting in a yard for five months, and we are not going to let anybody store with us believing that it is. Keep your own coverage on your own RV. Ask your broker what it covers while the unit is stored off your property. If your insurer wants the storage address, ask us and we will give it to you in writing.
We are not brokers and this is not advice
Everything in this section is a quotation from a government page plus a list of questions to ask. Do not cancel, reduce or change any coverage because of something you read on a transport company's website, including ours. Phone the person who actually holds your policy.
The mid winter check
Winterising is not a thing you do once in October and then find out about in April. The single cheapest habit in this entire guide is a twenty minute walk around the unit, once or twice between December and March, with a phone in your hand to take pictures. Everything expensive that we get called about started as something small and visible in January.
When to go
- Once after the first real cold snap, because that is when anything that was not properly drained will already have let go, and finding a split fitting in December is a repair. Finding it in April is a repair plus four months of water damage.
- After any heavy wet snow or freezing rain event. Those are the two weather patterns that put load on a roof and ice into seams.
- Late February into March, when the frost starts to come out of the ground and blocking starts to move. This is the visit that catches a corner going soft before it takes the door frame with it.
The twenty minute walk around
- Tire pressures, cold. They will be down, and the amount they are down by is not all leakage. The published relationship between temperature and pressure is in the tires section, along with the two different figures we found and the ambiguity in one of them.
- The blocking and the ground under it. Is anything sitting in an ice puddle. Has a pad sunk on one side. Is the unit still level across the door, which you can check with a torpedo level on the frame in about ten seconds.
- The roof, from a ladder and not from on it. Snow depth, ice at the low edges, anything that has landed on it out of a tree. What to do about accumulation, and the honest argument on both sides, is in the roof section.
- The cover, if you fitted one. Tears, a strap that has come loose, an edge that has started to flap. A cover that has begun to flap will polish a stripe through your clearcoat by March, which is the whole argument in the covers section.
- Tracks in the snow. This is the one advantage winter gives you. Mouse and rat traffic shows up as tracks converging on one point at the base of the unit, and that point is the hole you missed. Fresh snow is a better rodent detector than anything you can buy.
- Bay doors and the main door. Do they still latch. Have the seals frozen to the frames. A bay that has popped open in a wind is a bay full of snow.
- Inside, if you can get in. Smell it before you look at it. Damp announces itself. Check the moisture absorbers, check the fridge is still propped, check the ceiling around every roof penetration for a stain that was not there in October.
- The battery, if it stayed with the unit. Voltage, and whether the maintainer is still doing what you think it is doing. The chemistry specific detail is in the battery section.
Take the same photographs from the same spots every time. Comparing three sets of pictures tells you whether something is moving. Memory does not.
De winterising in spring
Spring is the fall list run backwards, with two extra jobs at the front that nobody remembers: look at it before you touch it, and undo the things you deliberately blocked off in October.
Before you turn anything on
- Walk it and look underneath. Nesting material near the furnace and water heater vents, chewed wire insulation, droppings in the compartments. Rodent damage found before the first start is a repair. Found after it is a fire risk and a wiring diagram.
- Take the screens back out. The furnace vent, the water heater vent, the generator exhaust, anything you covered. This is what the notes on the thermostat and in your phone were for. Running a furnace or a generator with a blocked vent is dangerous, and this is the sentence that stops it.
- Put the water heater back together in the right order. Drain plug or anode back in and tightened, then the bypass valves back to normal, then the pump. Doing it in the wrong order is how people end up with four gallons on the floor of a bay.
The water system
- Flush the antifreeze out with fresh water, every fixture, hot and both cold, the outside shower, the toilet and the black tank flush if you have one, until it runs clear and stops tasting of anything.
- Then sanitise the fresh tank. The published ratios and the published contact times, from Alberta Health Services and from the Province of Ontario, along with the places where those two sources do not agree with each other, are set out in full in the fresh water tank section of this guide. We are not going to reprint them here, because a number that appears twice on one page is a number that eventually gets edited in one place and not the other.
- Pressure test it dry. Wipe out the bays and the under sink cabinets so they are dry, then bring the system up to pressure on the pump or on city water and walk the whole unit looking for a drip. Wet cabinets hide leaks. Dry ones show them.
- Watch the pump. A pump that will not stop cycling with every tap closed is telling you there is a leak somewhere you have not found yet. Do not ignore it and go camping.
Power, gas and rubber
- Batteries back in, charged, clean and secured. Correct polarity, terminals cleaned, hold downs actually tight. A battery that slides around in a compartment on the first tow is a genuine hazard.
- Open the propane slowly, and leak check every connection you disturbed. Gas work on an RV in Ontario sits under an adopted code and a licensed trade, which we set out with the regulator's own wording in the propane section. We do not do gas work and neither should anybody who is not licensed for it.
- Test the alarms. Smoke, carbon monoxide and propane detectors, all of them, and change the batteries as a matter of routine rather than waiting for the chirp. These sit in a cold damp box for five months.
- Tires, cold, to the placard. Inspect the sidewalls for cracking and the tread for flat spotting. On age and service life we will not give you a number, because the industry guide we wanted to cite would not load on two separate attempts, and that refusal is recorded in the sources section. Your tire shop can read the date code on the sidewall in about five seconds.
- Seals and the roof, in daylight. Everything that penetrates the roof, plus the corners and the awning rail, before the first rain of the season rather than after it.
Before it moves
The first tow of the season is not the time to find out about the wheel bearings, the brakes, the breakaway switch or the lights, and none of those improve over a winter of sitting. We wrote a full pre transport walk through, including the safety chain and coupler checks and what we look at before we hook onto anything, on the how to prepare your RV for transport page. If we are the ones towing it out of storage, we do our own inspection before it rolls, every time, and we will tell you what we find whether you want to hear it or not.
And put the insurance and the plate back where they need to be before the unit moves, not after. See the plates and insurance section above.
The mistakes we see every April
This is the list, in roughly the order we run into them. None of these are hypothetical and none of them are rare. If you only read one section of this guide, read this one and then go back to whichever section it points at.
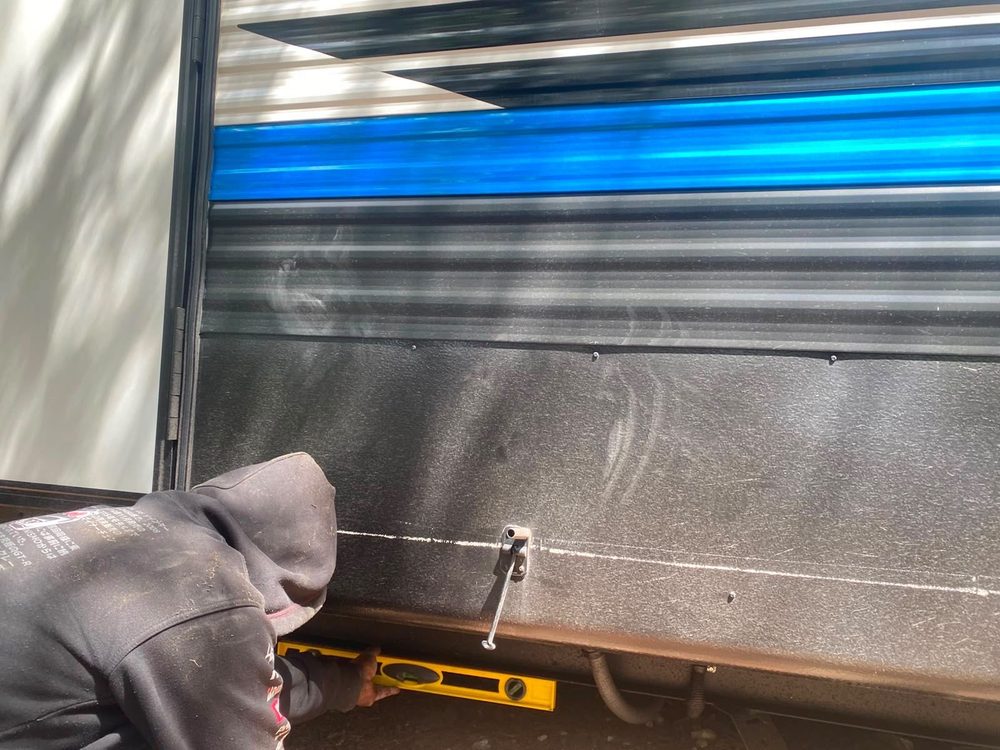
- The water heater was not drained and bypassed. The number one failure, every year, without exception. It holds several more gallons after the fresh tank and the lines are empty, and the bypass is what stops it swallowing the antifreeze that should be in your pipes. See draining the water system.
- Antifreeze went into the lines but never into the traps. Air will not clear a P trap and neither will a pink line full of antifreeze that never reached it. The trap under the shower is the one that splits. See antifreeze or blow the lines.
- The black tank was left full. It freezes as one solid mass, it does not thaw until April, and what it can do to a tank and a valve on the way is not a repair anybody enjoys paying for. See black and grey tanks.
- The unit was parked on soft ground on its own jacks. Then the frost came and went, and now the door will not close and the slide will not seal. This is the most expensive item on the list and the one that is almost entirely preventable with blocking. See where you park it and the levelling and blocking page.
- A blue poly tarp went over it. It trapped moisture against the roof, it held water in the low spots, and where it flapped it sanded the graphics off the side. See covers, tarps and shrink wrap.
- The battery was left connected and flat. A discharged lead acid battery freezes at a temperature a charged one ignores, and a frozen battery is scrap. On a motorhome it is usually the chassis battery rather than the house bank, because the house bank is the one people remember. See batteries and motorhomes and generators.
- The fridge was closed. Five months sealed shut in the dark, and the mould pattern is permanent in the door seal. Two seconds of propping in October prevents all of it.
- Nothing was screened, so something moved in. Furnace vent, water heater vent, wiring penetrations, the gap where the frame meets the underbelly. A hole the width of a pencil is a door. See rodents, and how they get in.
- Nobody went and looked at it all winter. Every item above except the first two is cheaper if it is found in January. See the mid winter check.
- Nobody wrote down what was actually done. Which was the last fixture that ran pink, whether the anode came out, whether the vents were screened, whether the bypass is open or closed right now. Six months later nobody remembers, and half the spring damage we see comes from guessing wrong about that in April. Put it in a note on your phone and take a photo of the water heater bay.
Sources, and what we could not verify
Every outside figure on this page was read directly from the issuing body's own page or document on 28 July 2026, and every one of them is listed below with a link. Where a source would not load, or would not say what we needed it to say, this page prints nothing and names the gap instead. There are four of those refusals and three claims we deliberately did not make, and all seven are set out by name.
Almost every RV winterising checklist online is a list of assertions with nothing behind them. Some of those assertions are folklore that has been copied from page to page for twenty years. We went and read the sources, and where the sources did not support the folklore, we said so on the page rather than quietly repeating it.
One rule runs through this whole guide. Where text appears between quotation marks, those are the source's exact words as published, including any typographical errors, which are marked inline. Where a rule or a figure is described without quotation marks, that is our summary of it, and if the detail matters to your unit you should go and read the original. We have linked all fifteen.
The fifteen sources this guide was built from
| Source | What it was used for on this page |
|---|---|
| United States Geological Survey, Water Density | The density statement about ice used in why freezing does the damage it does, and the correction of the expansion figure that most checklists print. |
| Alberta Health Services, Cistern Disinfection and Cleaning | The published bleach ratio and the minimum standing time quoted in the fresh water tank section. |
| Alberta Health Services, potable water haulers, cleaning and disinfecting tanks (PUB-0388-201906) | The second and different ratio and contact time from the same health authority, and the instruction to rinse and drain to waste. |
| Ontario, Disinfecting private water wells | The province's own standing time, its instruction about not drinking the water until it is tested, and its table based method of calculating a dose. |
| NIST Chemistry WebBook, propane, CAS 74-98-6 | The normal boiling point of propane, quoted as the table row it appears in, used to settle the question of whether propane freezes in an Ontario winter. |
| TSSA, Propane Code Adoption Document Amendment, FS-281-26 | Which CSA codes Ontario has actually adopted, including the one that covers installation requirements for recreational vehicles and mobile homes. |
| TSSA, propane cylinder exchanges compliance | The seven storage and separation rules quoted in the propane section, published together with our explicit warning that they are written for retail cylinder exchange operations and not for a homeowner's driveway. |
| Trojan Battery, Battery Maintenance | Storage practice for flooded lead acid and AGM batteries: charging before storage, the link between state of charge and freeze resistance, boost charging, and the interval for topping up a battery in long storage. |
| Battle Born Batteries, how to winterize your batteries | The manufacturer's own winter storage instructions for lithium iron phosphate, including the charge blocking temperature, the disconnect instruction and the published self discharge rate. |
| Battle Born Batteries, understanding temperature limits of LiFePO4 | The charge and discharge temperature limits and the role of the battery management system, and the second of the two figures we found for the charge cutoff. |
| Transport Canada, Riding On Air, tire inflation information | The metric relationship between falling temperature and falling tire pressure, the warning about how much pressure a tire can lose without looking flat, and the cold measurement instruction. |
| U.S. Tire Manufacturers Association, Tire Care Essentials | The imperial rule of thumb quoted in the tires section, published together with our observation that the page never states whether its degrees are Fahrenheit or Celsius. |
| CDC, How to Seal Up to Prevent Rodents | The hole size a mouse fits through, what to fill small and large holes with, and the specific instruction about gaps in trailer skirting. |
| Ontario, Rodent control in livestock and poultry facilities | The metric hole sizes for rats and mice, how far each will travel from a nest, the footing and apron depths for a permanent structure, and the materials list for blocking entrances. |
| Ontario, Register and insure a vehicle in Ontario | Everything quoted in the plates and insurance section: coverage in storage, the automatic renewal condition, the list of plate types that do not renew automatically, and returning plates. |
Notice what is not in that table. There is no other transport company, no RV forum, no dealership blog, no aggregator and no pest control company's marketing page. Where we could not reach a primary source we left the hole open rather than filling it with somebody else's copy.
Four things we went looking for and could not get
These are the gaps. Each one is a place where a lazier page would have printed a number.
- A tire industry service life and storage figure. The U.S. Tire Manufacturers Association publishes a Tire Care and Safety Guide as a PDF. We tried it twice. The first attempt timed out and the second returned a server error. Nothing from that document appears anywhere on this page, and that is why the spring section refuses to give you a tire age limit.
- Climate normals for our own area. We wanted to print the actual average first frost and the average January low for the Beaverton and Udora area from Environment and Climate Change Canada's 1991 to 2020 normals, so that the timing section would rest on published data rather than on our own experience. The station filter on the climate normals site returned the full unfiltered station list instead of a station, on repeated attempts, and no station page could be reached. This page therefore publishes no station level normals, and the timing advice is explicitly labelled as ours.
- Ontario's published design temperatures. The province publishes climatic design data, including January design temperatures by municipality, in a supplementary building code document. That PDF returned a permissions error. So no design temperature and no snow load figure appears on this page, which is why the roof section argues about snow in general terms rather than in kilopascals.
- The text of any Ontario statute or regulation. Ontario's e-Laws site returns a page telling us it needs JavaScript, with no statute text behind it, through every route we are permitted to use. CanLII disallows automated access in its robots file and we do not go around that, and archives, caches and mirrors are off limits to us as well. So no Ontario legislation is quoted on this page in quotation marks. Where the law matters we have cited the regulator's own plain language page instead, which is what the propane section does.
Three claims we checked and did not print
- That water expands nine percent when it freezes. This sentence is everywhere. What the USGS actually publishes is a density statement, not an expansion statement, and the two are not the same sentence even though they are related. We quoted what the USGS says and left it at that. The mechanism does not need the folklore version to be frightening.
- That a tire loses fifteen psi over an Ontario winter. We saw versions of this figure on several checklists. Transport Canada publishes a relationship between temperature and pressure, not a seasonal total, and the total depends on how cold your winter actually gets. We published the relationship and let you do the arithmetic for your own November.
- A single bleach to water ratio for sanitising a fresh tank. Two documents from the same provincial health authority give two different ratios, and Ontario's own well page gives a third method again. None of the three is written about RVs. Rather than pick a favourite and present it as the standard, we published all of them side by side with their sources and their differences, in the fresh water tank section.
Where a source is paraphrased instead of quoted, and why
A small number of sentences in the sources above use typographic characters that we cannot reproduce reliably in this page's encoding, and we are not prepared to silently change a character inside quotation marks and still call it a quotation. Where that happened, the sentence is described in our own words and attributed, rather than being quoted with a character quietly swapped. That applies to one range in the Battle Born storage instructions, to two of their temperature sentences, and to every temperature figure on the Trojan page, which mixes two visually similar symbols in a way we could not verify character by character. If any of those specific numbers matter to your battery bank, open the manufacturer's page from the table above and read it there.
Two places where a source disagrees with itself
We think this is more useful to you than a clean page would be, so here it is.
- Battle Born publishes two different charge cutoff temperatures. Their winterising page gives an internal temperature below which the battery will not accept a charge. Their educational article on temperature limits gives a figure one degree Fahrenheit different for the same behaviour. Both are quoted in the battery section with the page each came from. Neither number changes what you should actually do in an Ontario January, which is not to rely on charging a cold lithium bank at all.
- Ontario's rodent page gives different hole sizes in its prose and in its table. The narrative text and the table on the same government page do not convert to each other cleanly for either rats or mice. We published both, exactly as they appear, in the rodent section. The practical answer is unaffected, because the smallest figure on the page is the one you should be sealing to.
What on this page is ours rather than sourced
Our prices, our practice, our guarantee, the order we do things in and the failures we describe seeing in April are ours. They come from running this business, not from a document, and they are not presented as anything else. Our rates and terms are set out in full in the storage section above, and the way we price a tow is broken down on the RV transport cost guide. Where this page says we do not do something, that is a real limit on our licence and our competence, not modesty.
Where we do this
We tow, block, level and store RVs, trailers, park models and mobile homes across central Ontario and the Kawarthas from our base in Beaverton. These are the towns we work in most, and each one links to the page that covers it, with its own local detail on access, permits and the yards and parks we deal with.
If your town is not on that list, ask anyway. The full picture is on the service areas page. Our hours are Monday to Saturday, 7:00am to 7:00pm. Sunday closed, by appointment only. October and November are the busiest weeks of our year for storage moves, so the earlier you book a tow into storage the more choice you have about the date.